Cerakote-Gunskins-Hydro Dipping The Myth Explained
By Gregory Kielma
Tactical K Training and Firearms a Gunskins Dealer
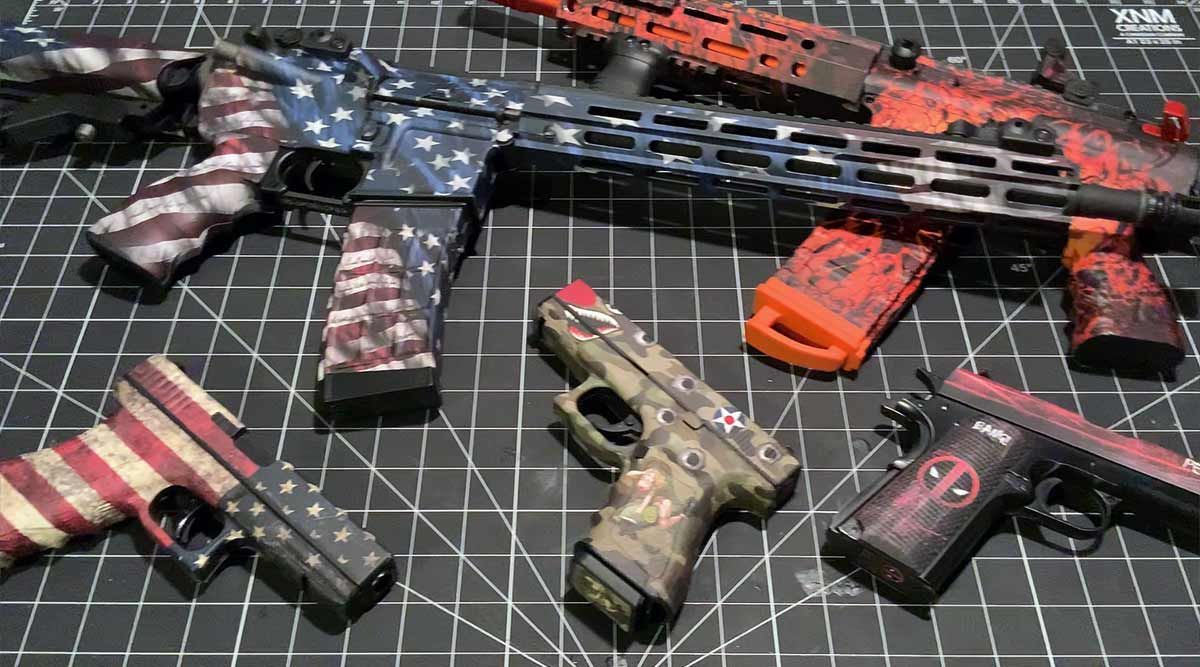
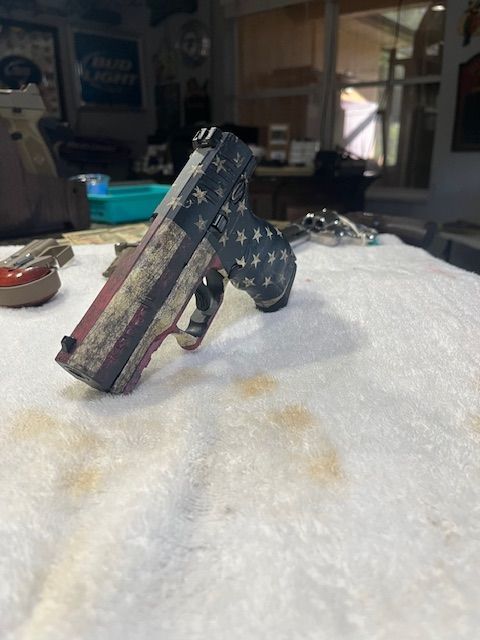
Gunskin Covered Firearms
Tactical K Training and Firearms a
Gunskins Dealer/Applier and Cerakote Painter
Gregg Kielma
Gunskins- Hydro Dipping- Cerakote
The myth is dispelled here. Let’s look at the coatings and skins I have worked with Cerakote and Gunskins. All good choices to make your firearm look good.
I have never Hydro Dipped a firearm so I can’t comment on this process. I've seen the finished product, and it look good.
I have, however, used Cerakote and I am a Cerakote coater as well as a Gunskins dealer and applier.
Cerakote Firearm Coating: Cost $200-$600.00 10+ Years Firearm must be disassembled and reassembled.
Cerakote is a specialized coating that can be applied to a variety of surfaces including wood, polymers, metals, and plastics. Cerakote finish can often be mistaken for paint, but it is very different. Cerakote benefits your firearm by enhancing the physical components, while also protecting your gun in the long run from daily wear and tear. As previously mentioned, the Cerakote finish can be applied to various surfaces. A variant of Cerakote called H-Series is recommended for firearms or other weapons like knives. This specific variation requires heat to cure the finish, but this will add the highest level of abrasion, corrosion, and chemical resistance.
Cerakote applications should only be done by professionals who have the training, experience, and proper equipment. Most customers who decide cerakote is the best course of action for them will have to send off their gun, through an FFL, to have the work done. There are many companies with licensed dealers that can do this practice. It’s both tough and durable, but hardly a necessity if you just want to add some looks to your pistol or rifle. Cerakote is a permanent application that cannot be undone very easily but will last a very long time and will protect your gun.
With Cerakote you’ll need some expensive tools and equipment to start. A high-quality HVLP spray gun is $200.00-$300.00 Respirator $300.00
Air compressor $300.00 and water separator $150.00 You’ll also need an air compressor separately for the sand blast cabinet $2000.00 Note this makes a big mess. Seal the cabinet up so you don’t have sand everywhere. You need a continuous high volume of air to sand blast properly.
The next item you’ll need is an oven. I don’t recommend using your home oven. I purchased a used oven at the discount store for $150.00 Depending on oven you’ll need to hire an electrician to supply the 220 V and breaker needed to run your stove $200.00 Internal oven thermometer $150.00 Don’t “skimp” here temp is critical on obtaining a great result.
Next, you’ll need tools to disassemble the firearm. As a Gunsmith I have all the tools needed, however you’ll spend another $100.00-$200.00 for quality hand tools. Sand Blast Cabinet $400.00 (use 100 grit for best results). I buy it by the 100 lb bag.
A small portable paint booth with explosion proof fans, $1500.00 if you don’t buy a booth you’ll get overspray on everything. This is really needed. You can find them cheaper, however you get what you pay for. Garage insulation and 3-ton split system 3500.00
How much room do I need: I have a 4-car garage. I use about 200 sq ft of the garage for coating. It’s tight but works if laid out properly.
Miscellaneous Items: You can build these yourself. You’ll need racks to hang the various parts. I spent $100.00 and built my own.
If you have never painted with a professional spray gun, you’ll need a lot of practice. You will need a skill set that takes time and practice. It’s not just the spraying but how you set up the gun and air compressor for the best results and how you mix the paints. If you never sand blasted, you’re in for a treat. Care and safety are paramount.
Ambient air temperature is critical. I live in Florida and when it gets below 45 F I don’t coat. I must run my A/C all day long when I’m in my shop to keep it at 78 F. I put solar on my home, not included, to help offset the cost of electricity. Running air compressors, A/C and ovens and everything you need is expensive. You need to build that into your pricing.
A professional system from Cerakote is around 10-12K. I can do a professional job for a fraction of that price. I have altogether approximately 8K and get a nice product when completed.
It took me 3 years to recoup the costs. And remember the maintenance costs to keep everything in top shape. I budget 150.00/ month for maintenance.
GunSkins Vinyl Wrap: $15-$75.00 Installed professionally 100.00-175.00 5 + years Gun can be covered without disassembly. As a dealer and installer I field strip the gun then apply the skin.
The cost of the tools needed for installing Gunskins are as follows:
Propane torch and nozzle $80.00 Hand heater 35.00 Razor knives 20.00 squeegee 15.00 That’s it. Space needed a desktop for hand guns and a 6’ table for a rifle. When applied correctly you can not tell the difference between Cerakote and Hydro dipping. This product is amazing. Tool spend, not more than $200.00
You’ll have to learn the technique and how to control the heat and distance but after you make a few mistakes it becomes easier. I’ve only wrapped 5 firearms to date, 8/24, but each of my customers was extremely happy. And remember this no chemicals to use except break clean to degrease the firearm.
The cost of the skins very on design, the more popular designs cost more, a difference of maybe $20-$30.00 not quality as all skins are very high quality and not difficult to work with. If you’re not very hand have the skin professionally installation cost $100.00-175.00 plus skin.
Now more info on the Gunskin Product:
American-made GunSkins kits are made from a conformed high-performance vinyl material. GunSkins are 100% waterproof, non-reflective, and very durable. We’re often asked about how GunSkins stand-up to the high temperatures of a muzzle. GunSkins are rated up to 230 degrees and have been heavily tested in all kinds of conditions. What that means, in short, is that wrapping a semi-automatic rifle, shotgun or pistol is no problem whatsoever from a heat perspective, but we don’t recommend wrapping the barrel of a tactical rifle like an AR-15, AK-47, etc. (handguards are fine) nor a suppressor. Also, unlike Hydro Dipping and Cerakote, GunSkins are removable!
GunSkins kits span more than 75 patterns, and include pre-cut pieces designed to fit any gun. Apply Gunskins to the surface of your firearm with heat (heat gun or hair dryers work great). Although they are removable if you’re ready for a new look to your gun, you can expect to get about 5 years out of a well-done installation.
GunSkins can be applied at home with few tools and no harmful chemicals, do not affect the operation of your gun, and provides a durable layer of protection from water and dirt that gives the gun an attractive look. Since GunSkins is a DIY application, there is room for error while applying the wrap to your gun. The vinyl can be removed, adjusted, and reapplied to address any wrinkles, air bubbles, etc. The material is very easy to work with and forgiving. With the right use of heat, the vinyl wrap can conform to any shape and will look as good as any other finish like Cerakote or Hydro Dipping.
GunSkins offers kits with pre-cut pieces to fit many of the most popular guns – popular rifles, shotguns, pistols, and AR-15 rifles – while also offering patterned vinyl sheets of different sizes for other guns and gear. If there is excess material, it's easy to trim away the pieces using a #11 hobby knife.
Hydro Dipping: Cost $200-$600.00 10+ Years Firearm must be disassembled and reassembled.
Hydro Dipping is a method of applying a pattern to three-dimensional and submersible surfaces, not just onto guns. Hydro Dipping also has a few names that are interchangeable. Those names are Hydro Graphics, Water Transfer Printing, or Immersion Printing. As you can see from the different names of this method, water is involved.
Hydro Graphics is a relatively costly and complex process that is quite permanent unless a professional is able to take it off. With little room for error, the right tools and chemicals on-hand, and a large learning curve, this practice is best left to the professionals. With that in mind, you’ll likely need to bring or ship your firearm through an FFL to a certified professional. This process offers image-defining styling options that leave your surface in a decorative coating will last 10 plus years, is easy to clean, and stain resistant.
If you decide to go through with this process and do it yourself, here are steps to follow to ensure your gun is evenly coated and every crevice gets covered:
1. Clean your gun and make sure the surface is even with no dust or debris.
2. Then, spray a base coat/primer to your gun, but do not spray too much to where it runs. Spray 1-2 times and leave to dry.
3. Cut the film to the size and shape of your gun. Then, the camouflage pattern is laid on the surface of the large tub of water which will float and should be left for the film to hydrate.
4. After about a minute or so, apply the activator by spraying it evenly over the film.
5. Next, dip your gun at a 45-degree angle and let the entire gun submerge in the water. Remove the gun from the water and rinse immediately with cold water for 3 minutes to remove any residue.
6. Finally, after you dry the item, apply the top coat and spray your gun with this aerosol coat spray 1-2 times, or to your liking.
It All Comes Down To Personal Preference
When it comes down to it, deciding between your options is all up to personal preference. We’ve had many customers who could not tell the difference between a Gunskins wrapped gun, a Cerakote gun, and a Hydro Dipped gun. Hydro Dipping, Cerakote, and GunSkins all achieve a very similar result by adding protection to your gun, while also adding a new color scheme or pattern. The main questions to consider when choosing one method over the others are: what is your budget, do you want this color/pattern forever, do you want to do it yourself? You can’t go wrong, and your gun will come out looking new, fresh, and attractive!
We've worked hard to continue to improve the GunSkins product, and we're hearing from others that it is competitive with Cerakote and Hydro dipping. Thanks to Spear Tactical Reviews for their comparison work: “More durable than cerakoting and hydro dipping, it’s a great way to protect the surface it also allows you to change the look up as often as you would like for about half the cost.”